
This documentation provides comprehensive insights into the Install and Activate Element Pack Pro process step by step.
Download Element Pack Pro
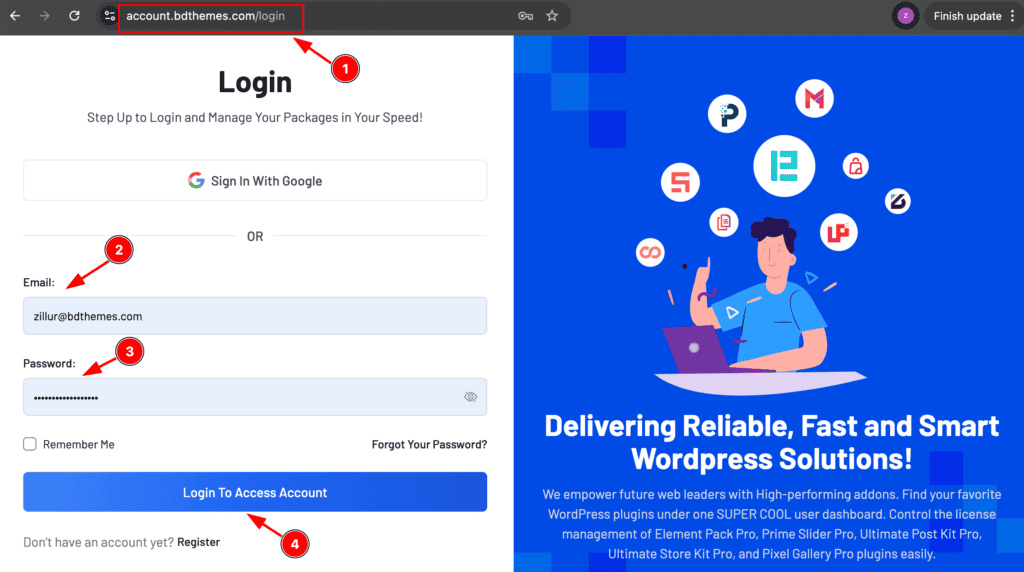
Go to the link accounts.bdthemes.com
Enter the Purchase email ( The email used for purchasing the Element Pack Pro ).
Enter the password.
Click on the ” Login To Access Account “ button to login to your license managements dashboard.
After successfully login, you will see the dashboard.
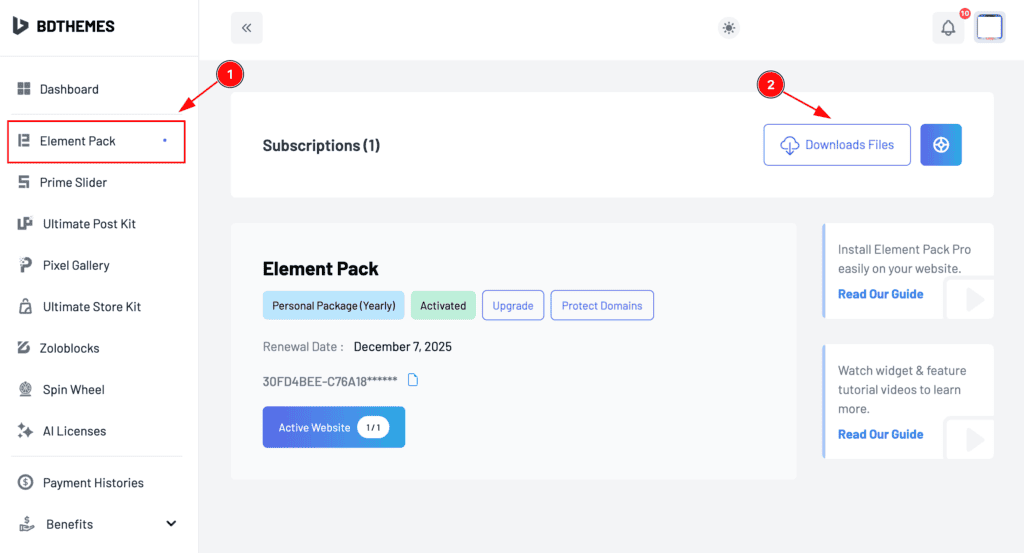
Select the “ Element Pack Pro ” tab from left side bar. It will appear the Element Pack Pro information.
Find the ” Download Files ” button on the right top side and click on it.
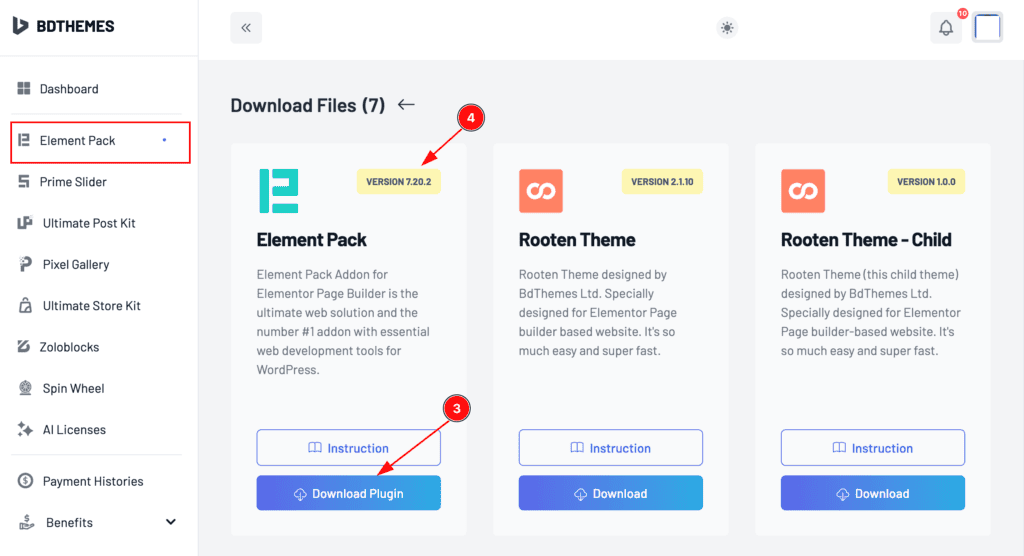
Now you will see the Element Pack Pro plugin just click on the ” Download Plugin ” button and it will start to download.
Top right corner the latest version will appear there.
Install & Activate Element Pack Pro
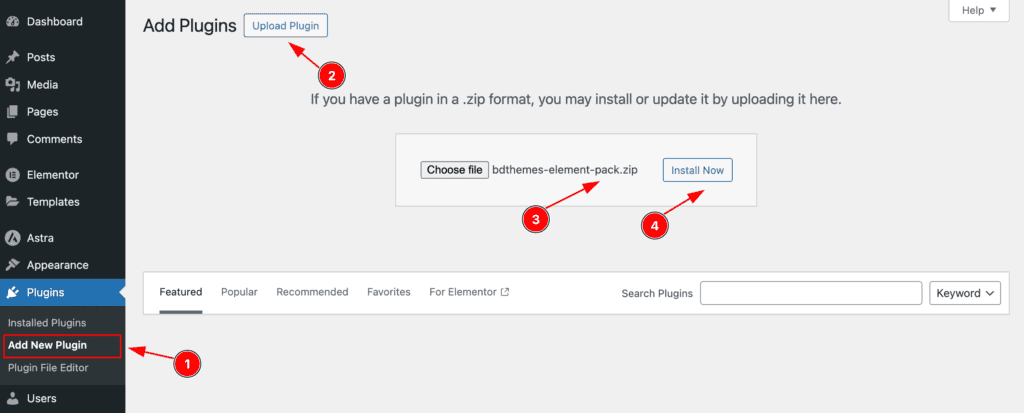
Navigate to the Plugins tab and click on the ” Add New Plugin “.
Click on the ” Upload Plugins ” button and it will appear a file box.
Choose file from desire location and the file name will appear ” bdthemes-element-pack.zip “.
Then click on the ” Install Now ” button.
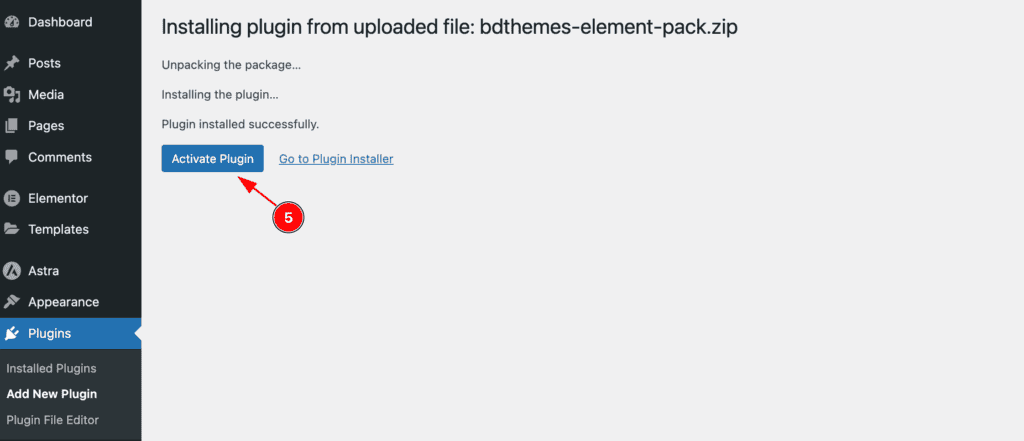
After completing installation the ” Activate Plugin ” button will appear and click on it to activate the Element Pack Pro plugin.
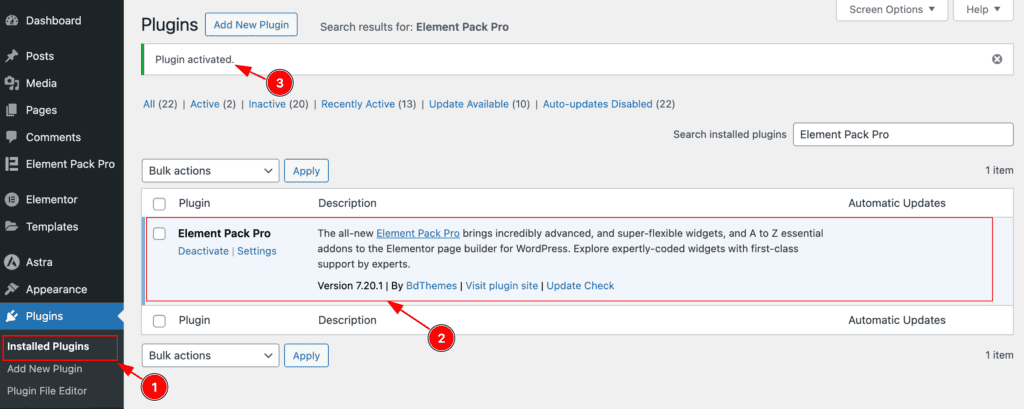
Go to Installed Plugins section under Plugins Tab.
Check the Element Pack Pro plugin are activated.
The notification appear on the top, Please ” Plugin activate “.
Activate the License Key
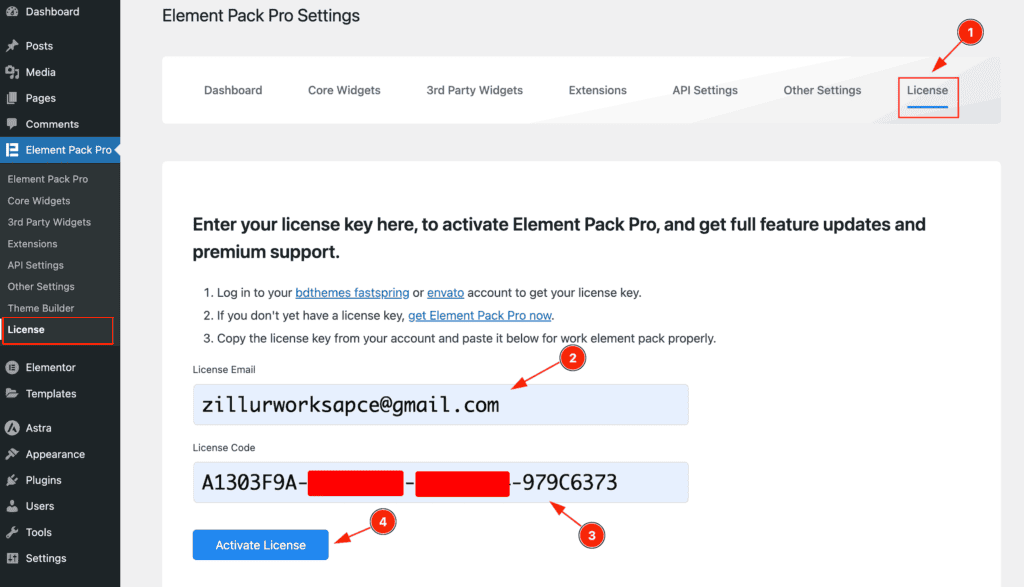
On WordPress Dashboard Navigate to Element Pack Pro from the sidebar menu and Go to License navbar.
Enter the Email of your purchase package.
Enter the License key.
Click on the ” Activate License ” button to activate the license key.
Confirm License Activation
After Successfully Activating the License key.
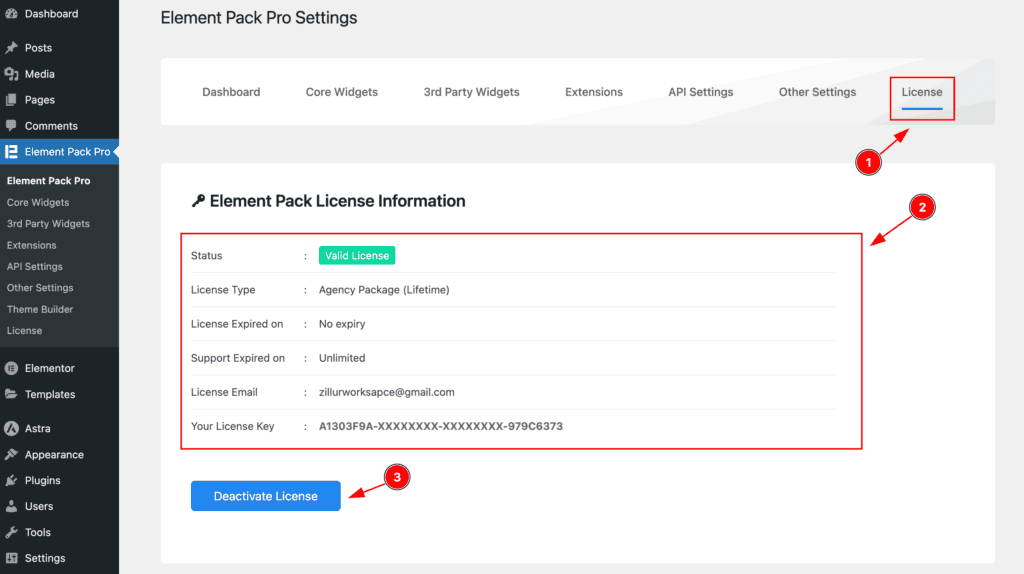
Navigate to ” License ” nav bar.
The License Information will appear.
Status | Valid License ( It means license is okay ) |
License Type | Package Name and Type ( Yearly or Lifetime ) |
License Expired on | License expiry date will appear. |
Support Expired on | Support expire date will appear. |
License Email | License email will appear. |
Your License Key | The license key will appear. |
” Deactivate License ” button to deactivate the license key.
Activate Core Widgets
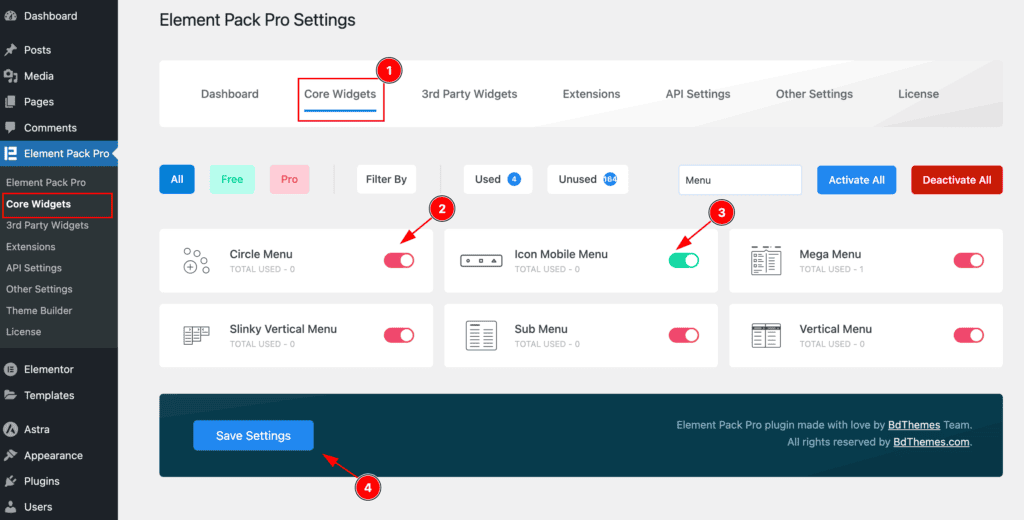
Activate widgets of Element Pack Pro,
Navigate to the ” Core Widgets ” tab and core widgets will appear.
Enable the switcher to activate The Red Color represents the Pro Widgets.
Enable the switcher to activate The Green Color represents the Free Widgets.
Click on the ” Save Settings ” button to make changes.
Note: Don’t forget to click on the ” Save Settings ” button after activating/deactivating widgets.
Categories Widgets
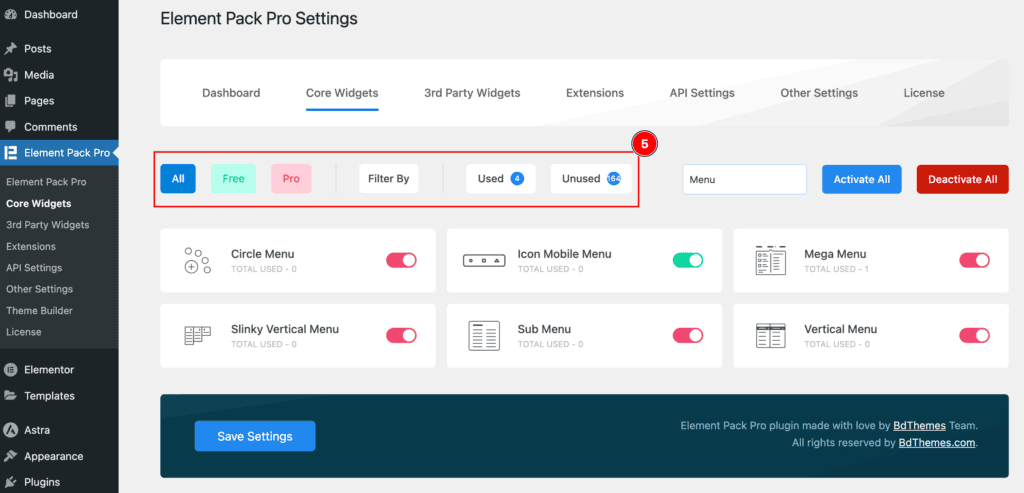
Category tabs are to easily find by it’s category.
All | All the widget will appear Free & Pro. |
Free | Free widgets will appear only. |
Pro | Pro widgets will appear only. |
Filter By | New, Gird, Tabs, List Carousel, Slider, Timeline, Template Builder, Others |
Used | Used widgets appear. |
Unused | Unused widgets appear. |
Search by Widget Name

Search by the name ( e.g: ” Mega Menu ” ) and it will appear the available widgets.
Enable the ” Mega Menu ” switcher and activate it.
Activate/Deactivate then click on the ” Save Settings ” button.
Activate All Widgets once
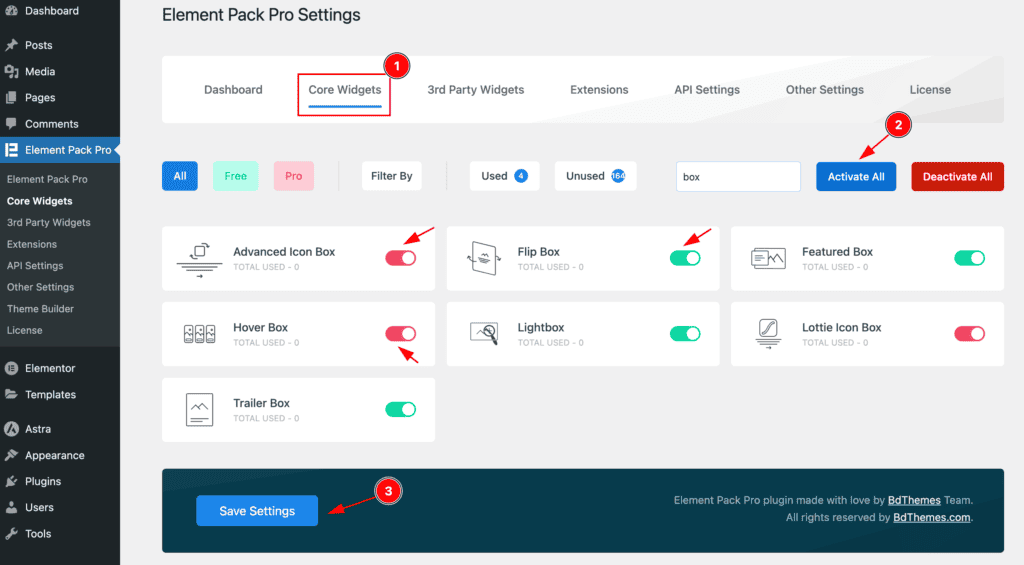
To activate all the widgets at once,
Go to desire tab (e.g.: Core Widgets ).
Click on the ” Activate All ” button on the category tabs right after the nav bar. It will activate all the widgets.
click on the ” Save Settings ” button to data save successfully.
Deactivate All Widgets once
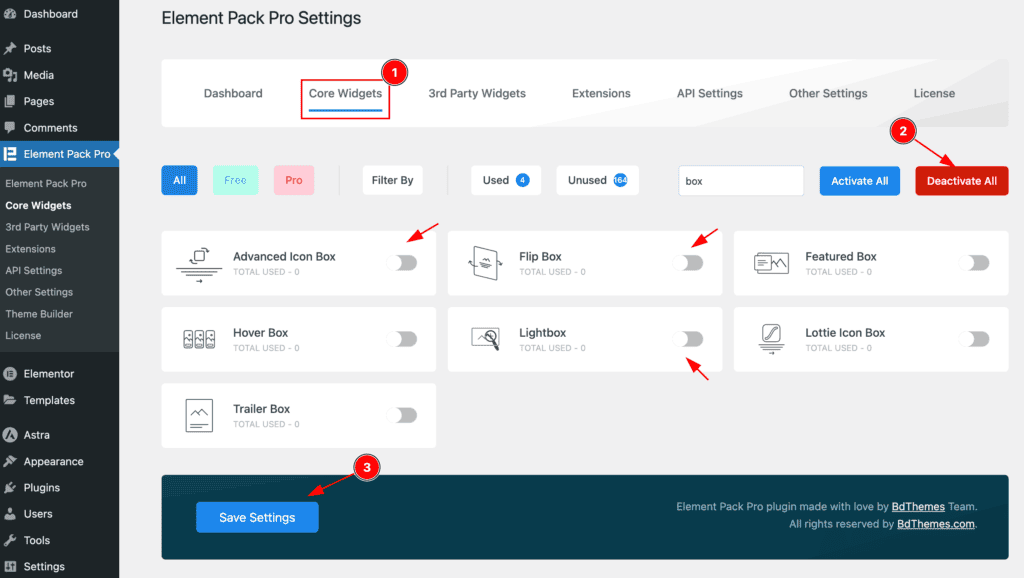
To deactivate all the widgets at once,
Go to desire tab (e.g.: Core Widgets ).
Click on the ” Deactivate All ” button on the category tabs right after the nav bar. It will deactivate all the widgets.
Click on the ” Save Settings ” button to data save successfully.
3rd Party Widget

First, Activate the 3rd Party Widgets
Please navigate to the “ 3rd Party Widgets ” tab , The 3rd party widget will appear on there.
Click on the ” Download Icon” and the relevant plugin will be download. Then activate the plugin.Extension
Hit the ” Save Settings ” button to data save successfully.
Extension
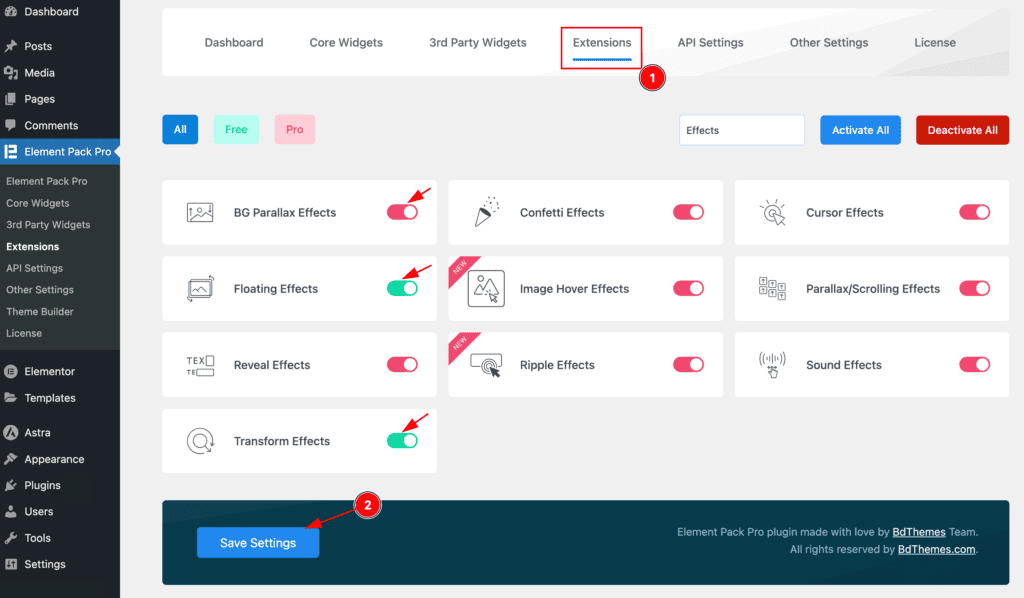
To Activate the Extension follow this,
Go to Extension nav bar and enable all the widgets switcher.
Click on the ” Save Settings ” button to data save successfully.
API Settings
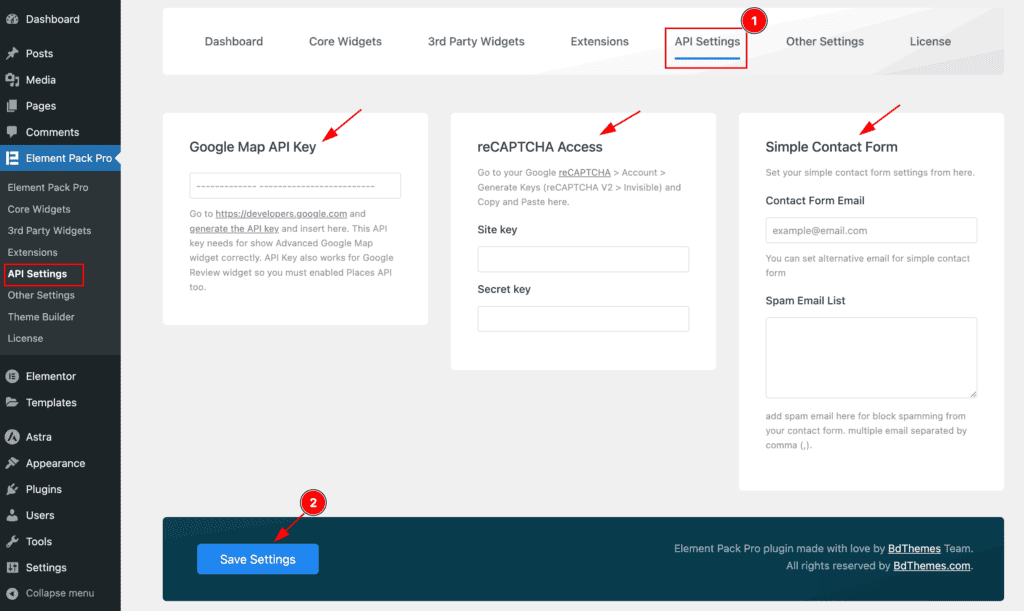
To Set API Key follow this,
Go to API Settings nav bar. Several option for the API Settings. E.G.: Google Map API Key, reCAPTCHA Access, Simple Contact Form.
Click on the ” Save Settings ” button to data save successfully.
Other Settings
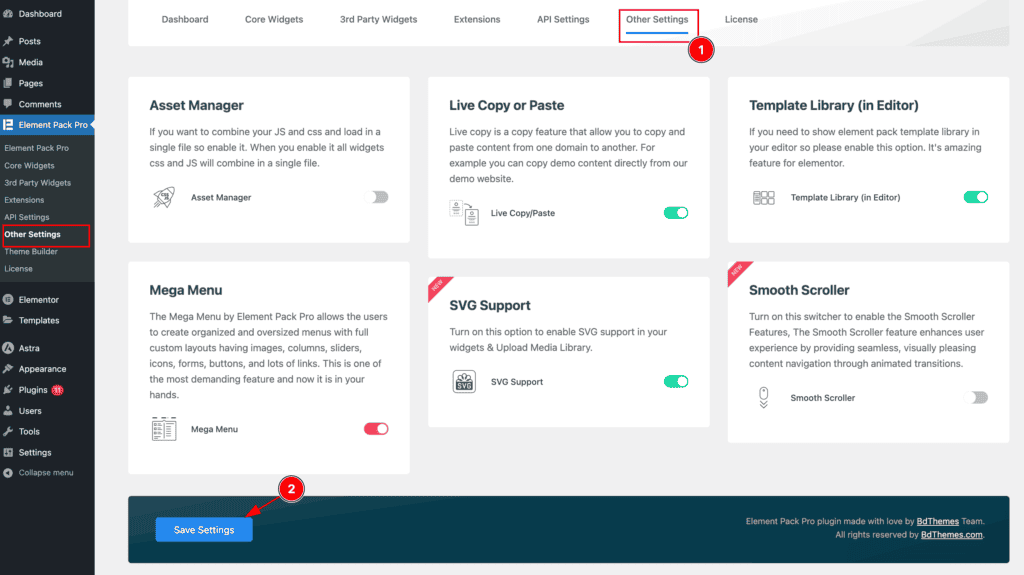
User interactive feature by activating from other Settings.
Go to Other Settings nav bar.
Asset Manager: Enable it to optimize the JS AND CSS loading.
Template Library: Enable it to show the Template library on the Editor page.
Live Copy or Paste: Enable to use magic feature to live copy and paste the widgets/templates.
Mega Menu: Enable it to show the mega menu.
SVG Support: Enable it to show the SVG Support.
Smooth Scroller: Enable it to scroll smoothly on the website page.
etc.
Click on the ” Save Settings ” button to data save successfully.
Video Assist
By following the instruction you will be able to download and activate the Element Pack Pro and it’s widgets.
Thanks in advance.